Using the Trinity Interface
A quick tour of the web UI — dashboard, agent management, chat, and day-to-day operations.
Trinity Platform Demo — full UI walkthrough
May 2026
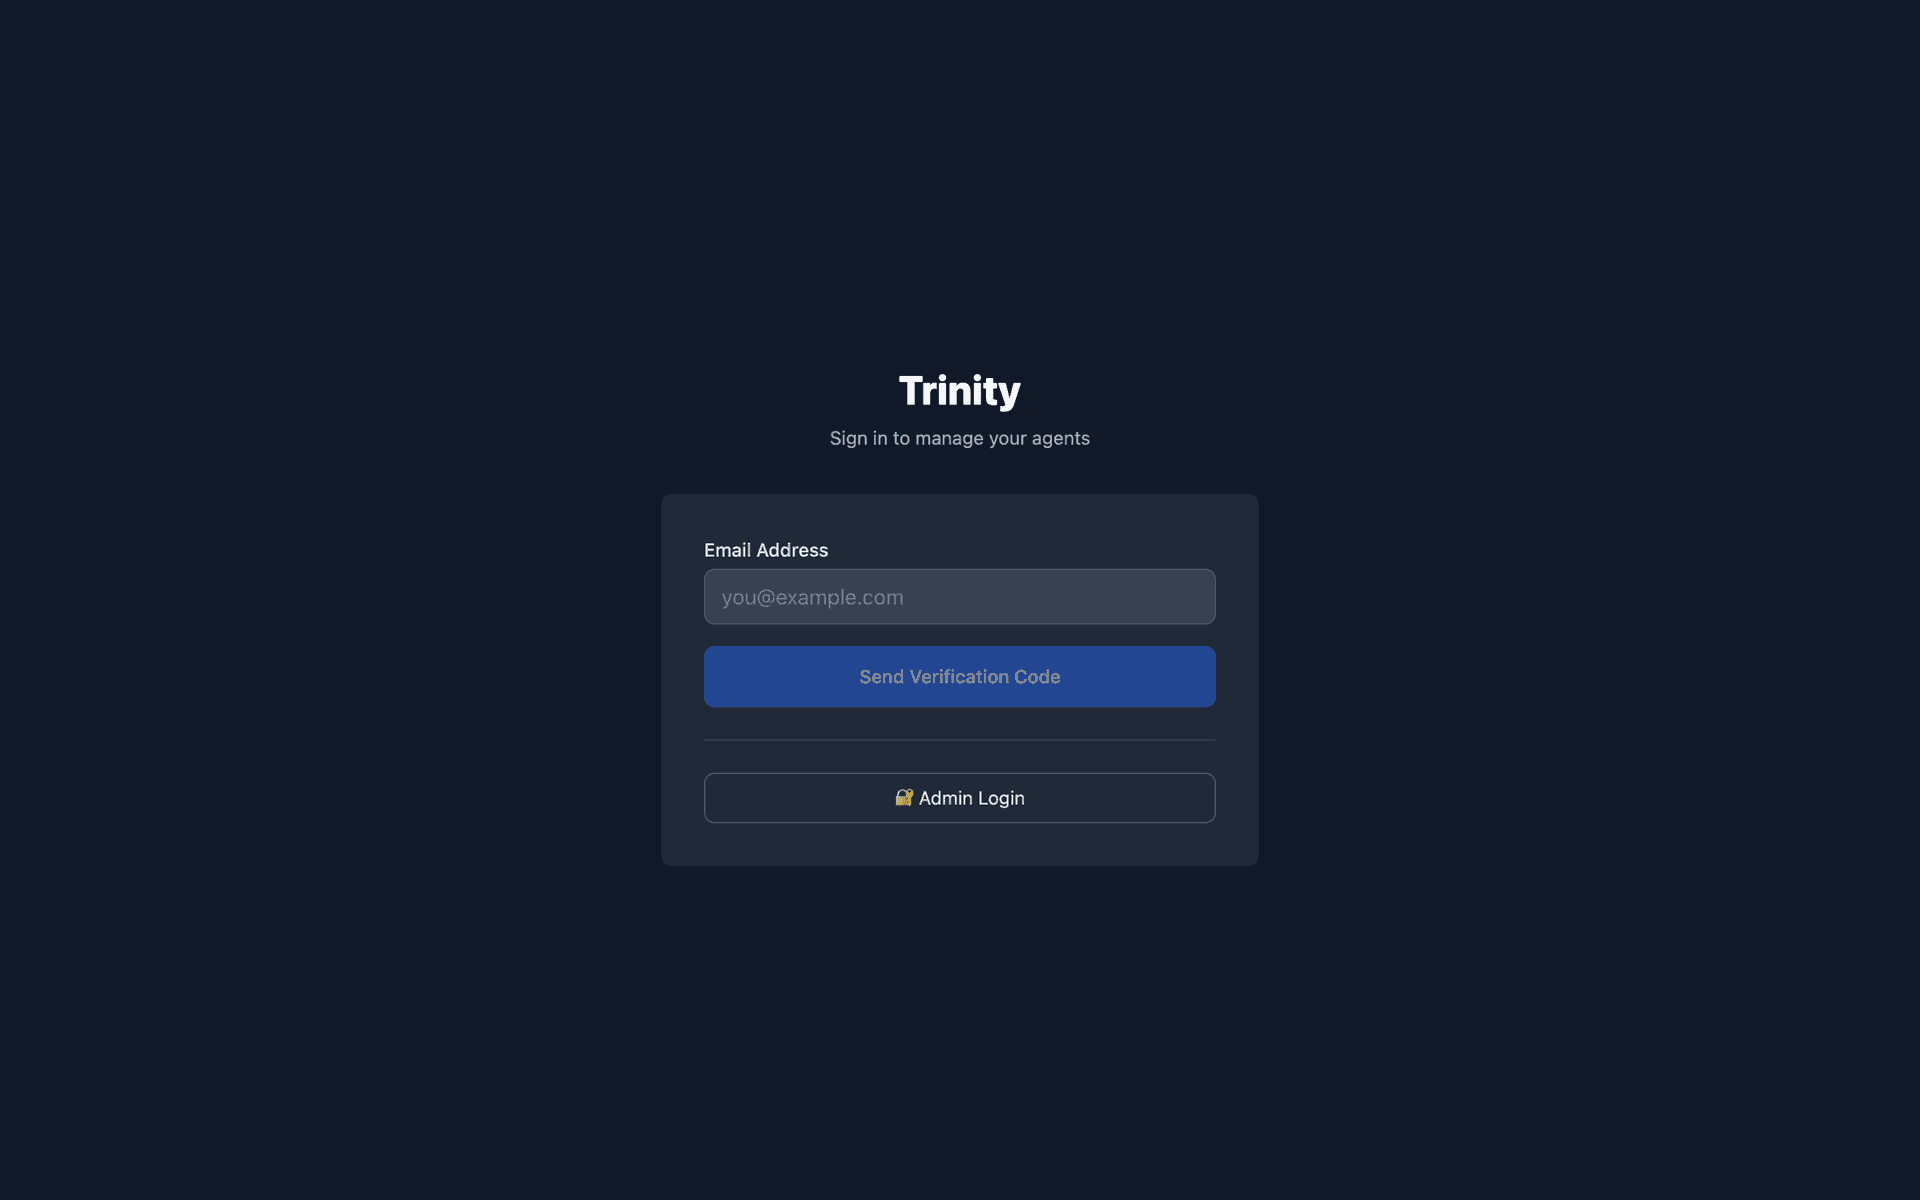
Logging In
Admin login — Enter username admin and the password set via ADMIN_PASSWORD in .env before first boot (self-hosted) or the one chosen at signup (cloud). There is no first-visit password wizard.
Email login— Enter your email to receive a 6-digit code (requires email service configuration).
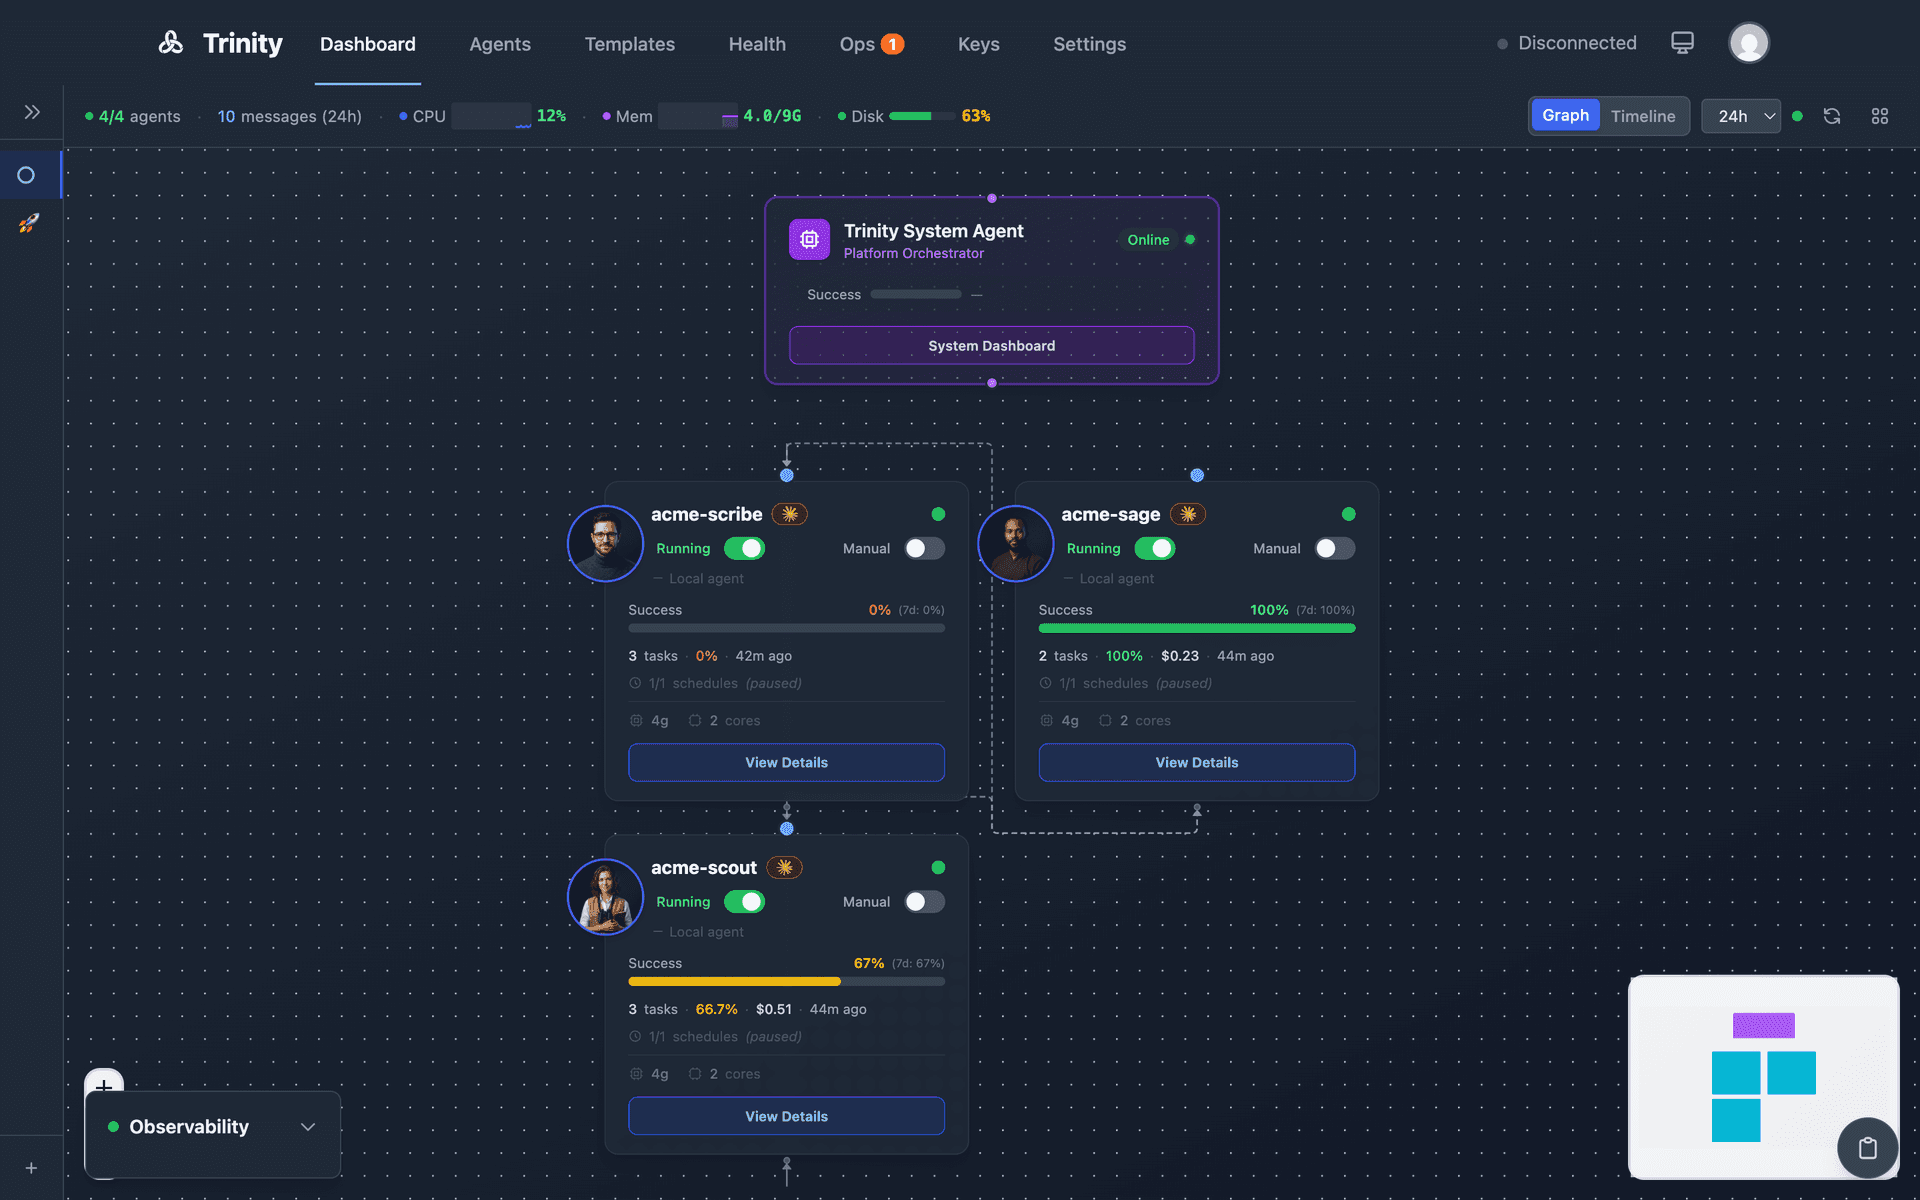
Dashboard
The dashboard gives you a bird's-eye view of your agent fleet:
Network graph— Visualizes agent-to-agent relationships and delegation flows.
Timeline— Shows recent executions and agent activity.
Tag cloud— Quick filtering by agent tags.
Quick actions— Create agent, open the Operations page.
Agent Management
Click any agent to open its detail page with tabs for:
Chat
Talk to your agent, view conversation history
Schedules
Cron jobs, trigger history, next run times
Files
Browse agent workspace, download files
Config
Credentials, permissions, autonomy settings
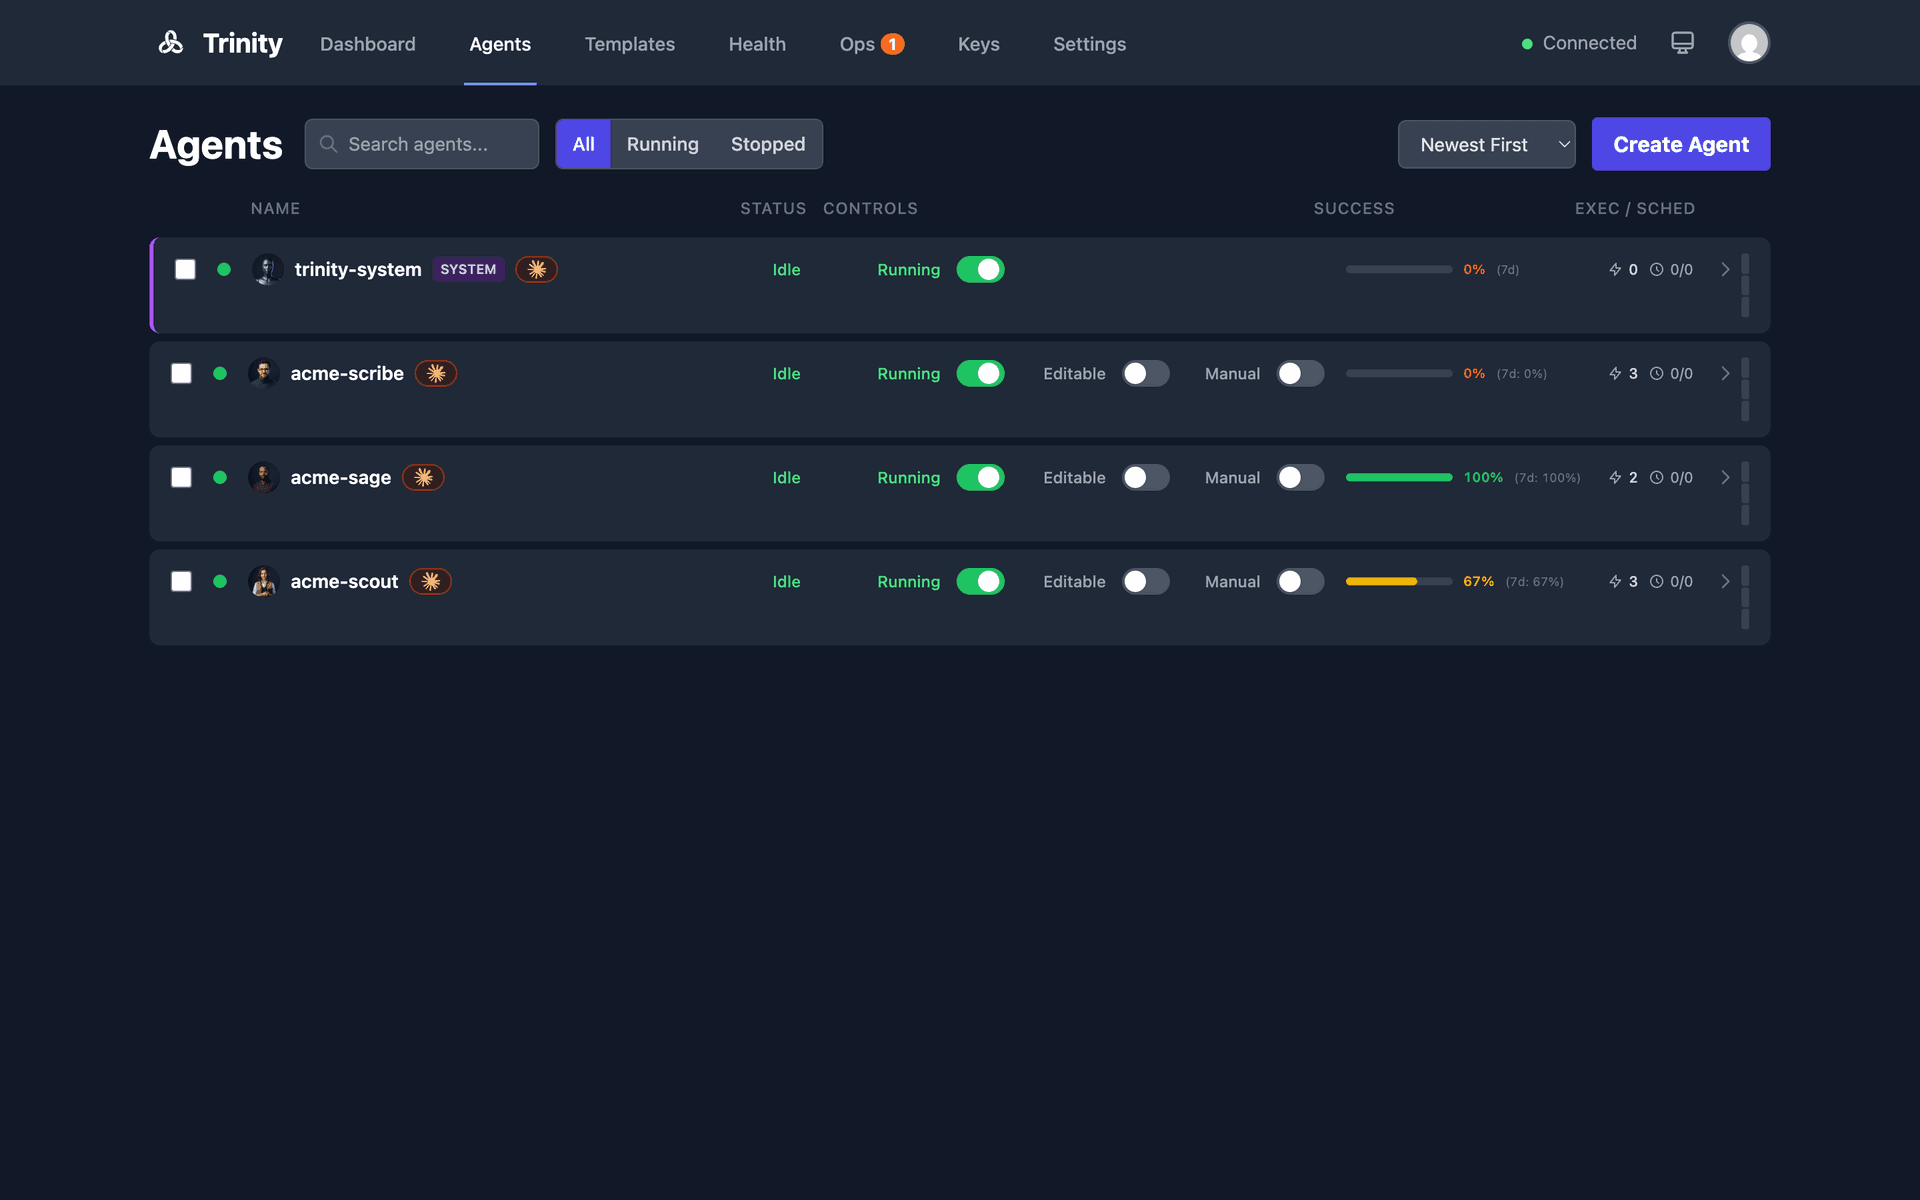
Start/Stop— Toggle agent container state.
Autonomy mode— Enable/disable scheduled operations.
Terminal— SSH-style access to the agent container.
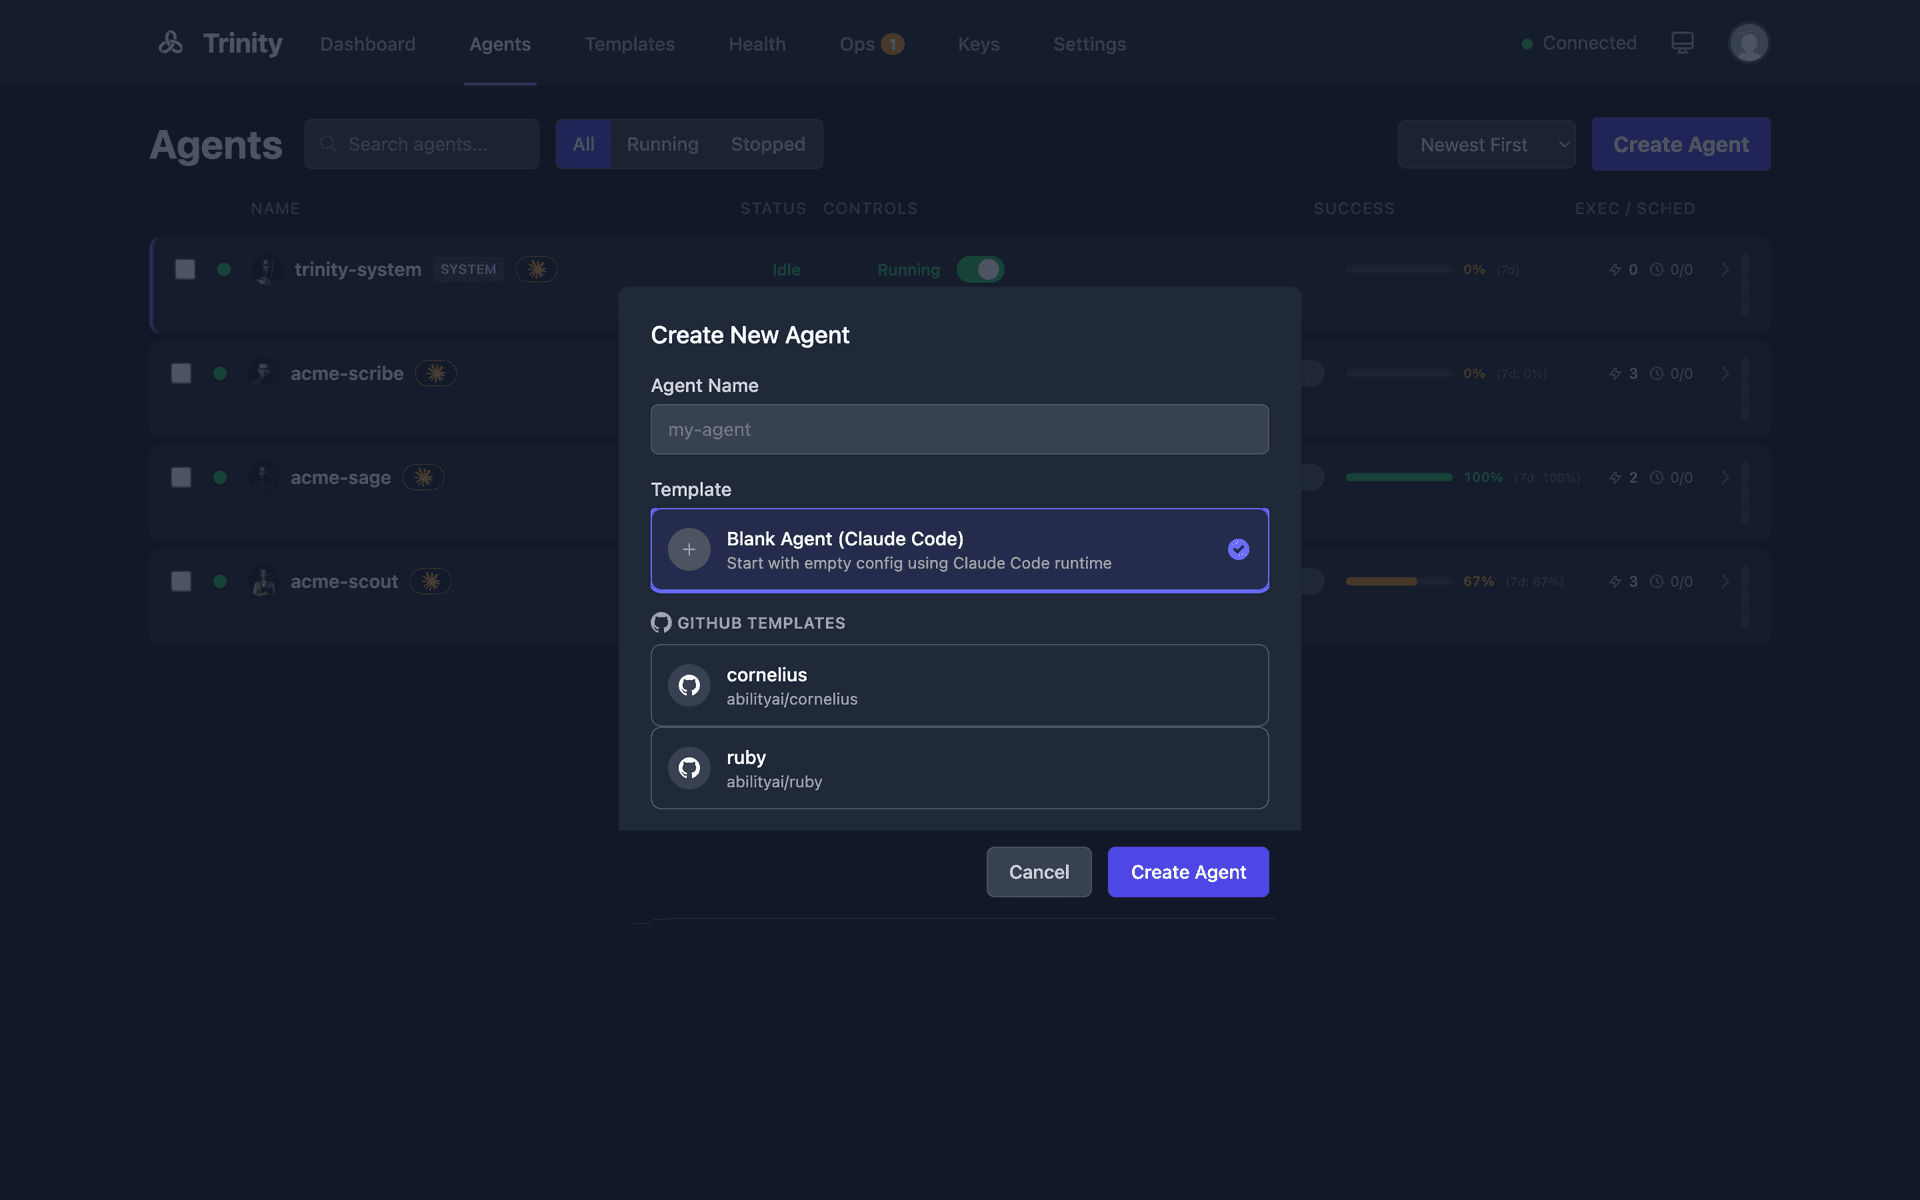
Creating Agents from the UI
Click Create Agent on the Dashboard or Agents page:
Choose a source— GitHub template, GitHub URL, or from scratch.
Enter a name — Lowercase with hyphens (e.g., my-research-agent).
Create— Trinity clones, builds, and starts the container.
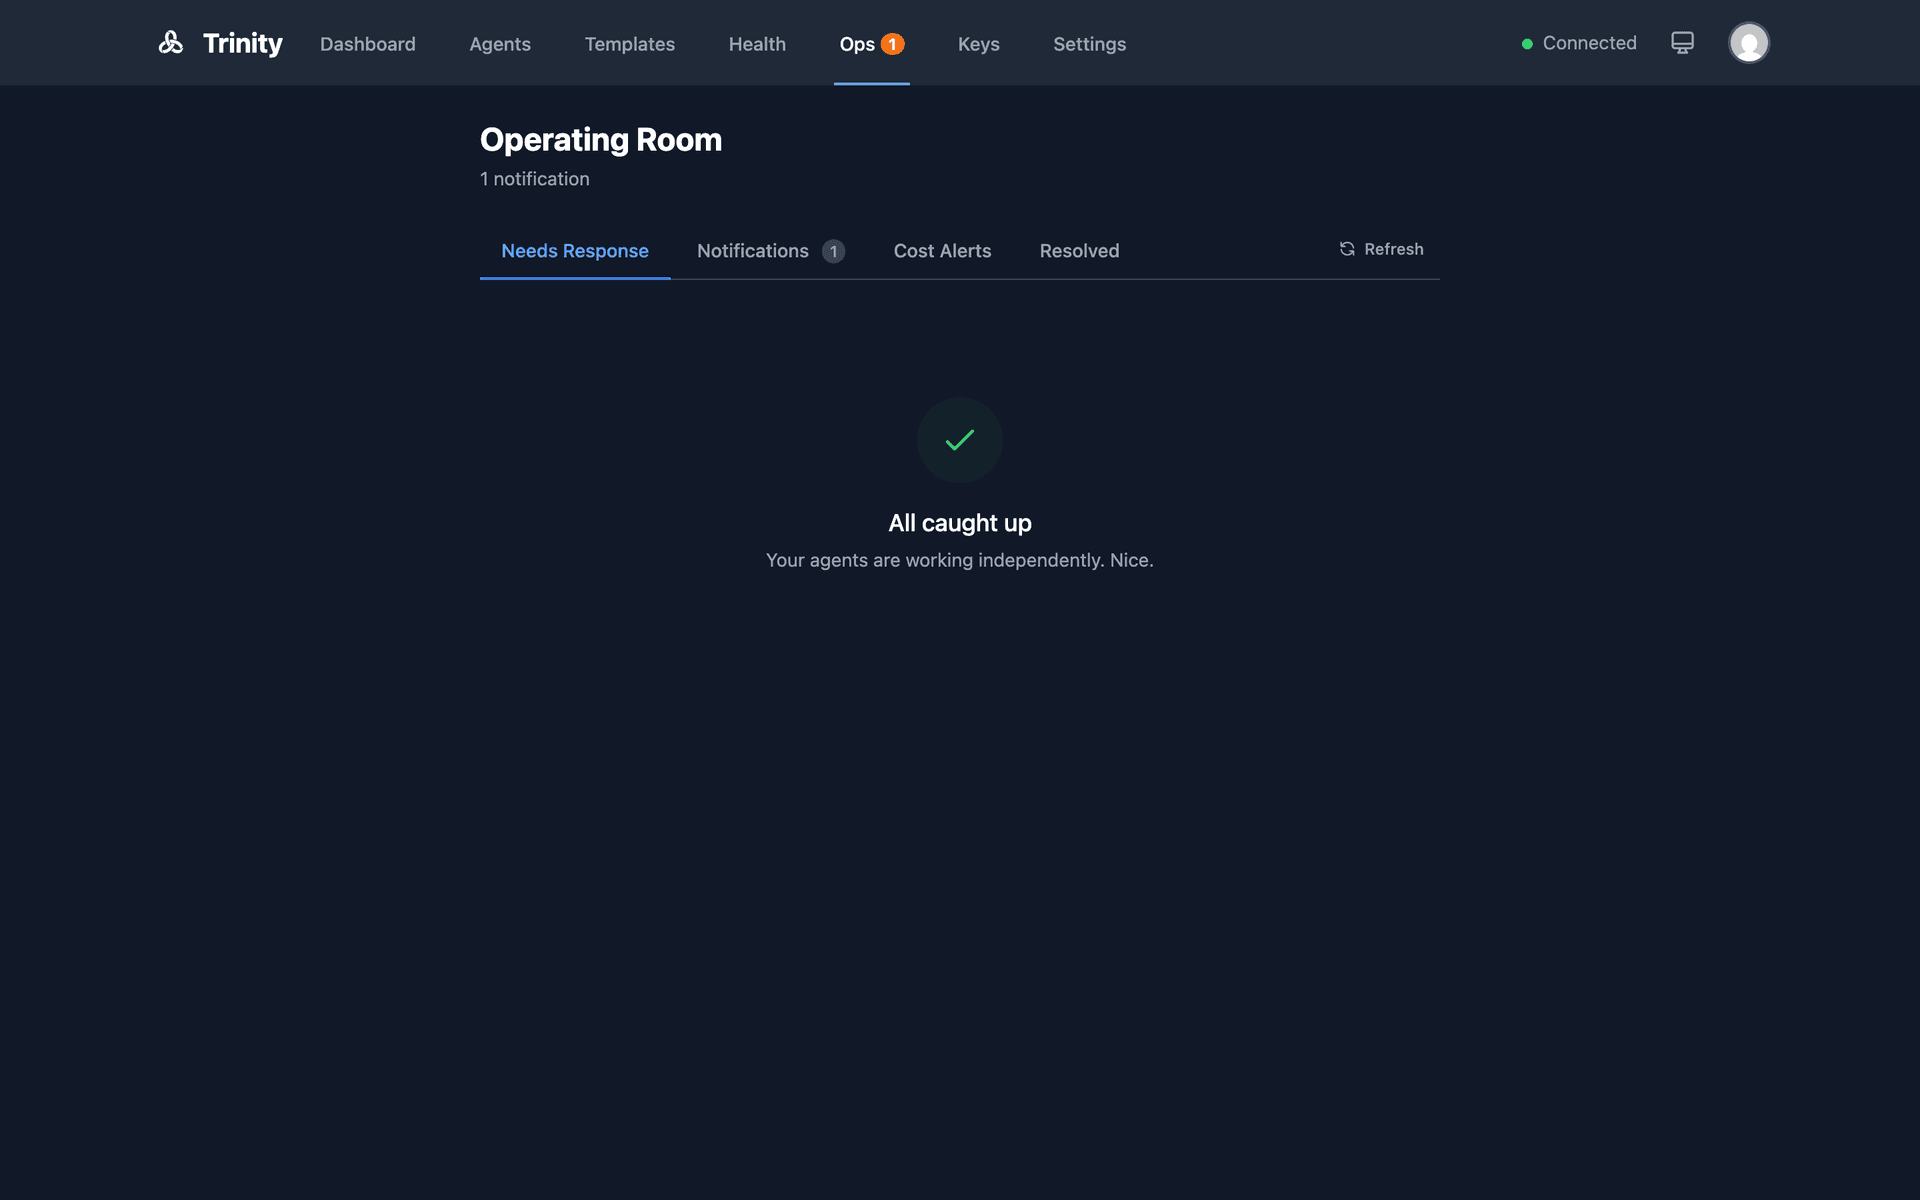
Operations
Operations in the top nav is your control center for real-time oversight — one page at /operations with five tabs:
Needs Response— Agent questions and approval requests waiting on you.
Notifications— Agent alerts and status changes.
Health(admin only) — Fleet health status; the monitoring loop is off by default and must be enabled explicitly, and the setting persists across restarts.
Executions— All task runs across your fleet, with filters and live stats.
Resolved— Previously handled items.
The nav entry carries a single badge counting pending queue items and notifications; it pulses when something critical is waiting. Each operator tab has a Clear All button for bulk cleanup.
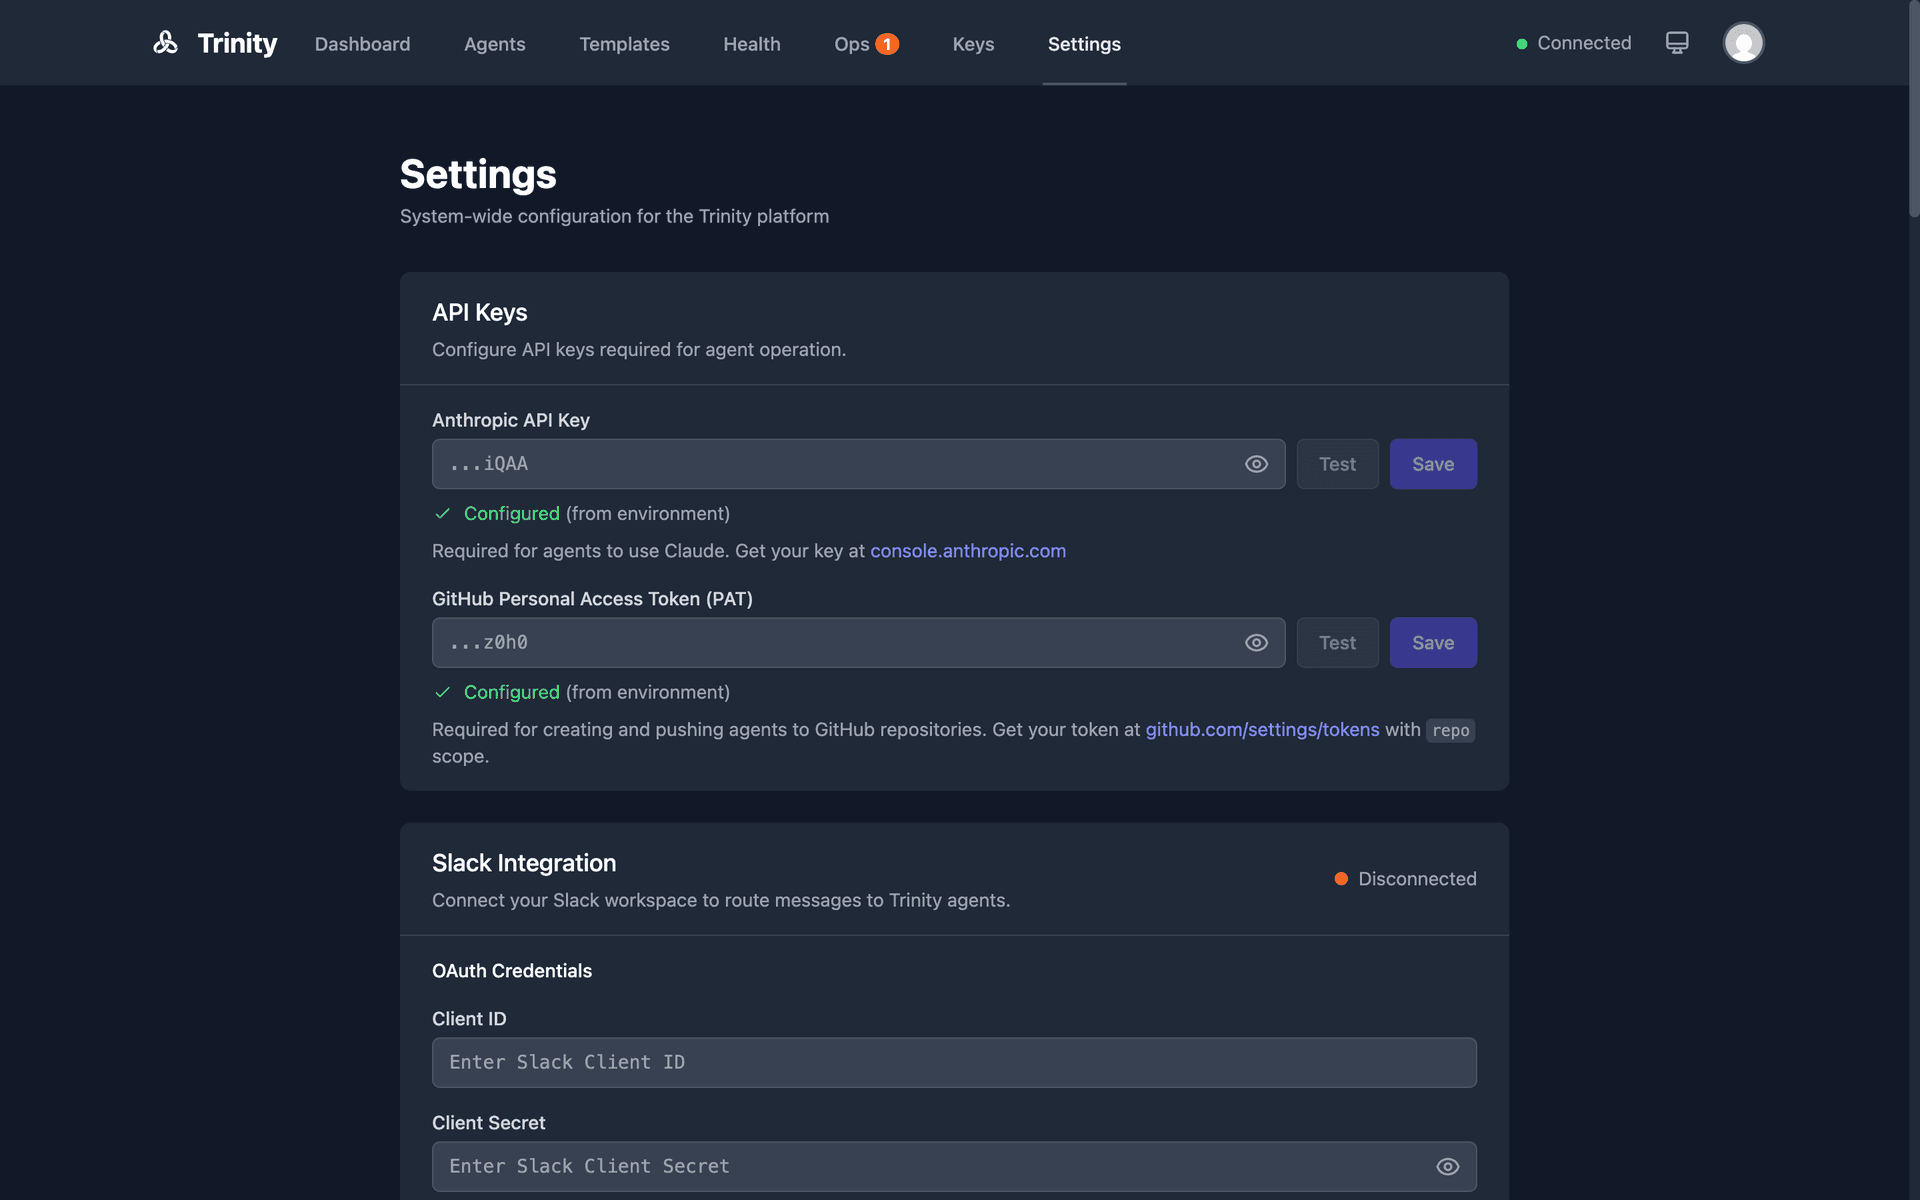
Settings (Admin Only)
The Settings page lets the admin configure: